If you've been browsing Pinterest, Instagram, or luxury design magazines lately, you've probably noticed a trend: seamless, monolithic surfaces that flow from wall to floor without a single grout line. That's microcement — and it's rapidly becoming the material of choice for modern homes and commercial spaces across the United States. But what is microcement exactly, and why is it generating so much buzz in 2026?
In this complete guide, we'll explain everything you need to know about microcement: what it's made of, where you can use it, how it compares to polished concrete, epoxy, and tile — plus honest pros, cons, cost ranges, and maintenance tips. Whether you're a homeowner planning a renovation or a design professional exploring new materials, this is the only guide you'll need.
What Exactly Is Microcement?
Microcement (also spelled micro cement or micro-cement) is a polymer-modified cementitious coating applied in ultra-thin layers — typically just 2–3mm total thickness. It creates a continuous, seamless surface that can cover floors, walls, countertops, stairs, and even furniture.
Unlike poured concrete (which is structural and thick), microcement is purely decorative and protective. It's applied over existing substrates — concrete, tile, drywall, wood — without demolition. This makes it one of the most versatile renovation materials available today. Think of it as a second skin for your surfaces: incredibly thin, incredibly strong, and endlessly customizable.
Microcement Composition: What Is It Made Of?
Not all microcements are created equal. Most brands on the market use acrylic resins as their binder — a cost-effective approach, but one that leaves the material porous and dependent on topcoat sealers for water resistance.
Key fact: ATRIA's microcement stands apart from most US options because it uses polyurethane resins with quartz, marble sand, and Etna volcanic mineral — not acrylic binders like most competitors, and not epoxy resins like several UK and European “microcement” brands. The polyurethane-mineral combination creates a hard-elastic, closed-pore structure after curing that is molecularly water-repellent at the material level — before any sealer is applied. Combined with our aliphatic polyurethane antibacterial topcoat, the assembly becomes fully waterproof for wet-area installations.
The mineral blend — hard quartz, marble sand, and Etna volcanic mineral — gives ATRIA's microcement exceptional hardness and a refined, natural texture that acrylic-based competitors can't replicate. Colorificio Atria S.r.l. has been perfecting this formula in Partanna, Sicily since 1968 — over half a century of iterative refinement.
Where Can You Use Microcement?
Almost anywhere. That's one of its biggest advantages. Microcement is suitable for both interior and exterior applications, residential and commercial. Common applications include:
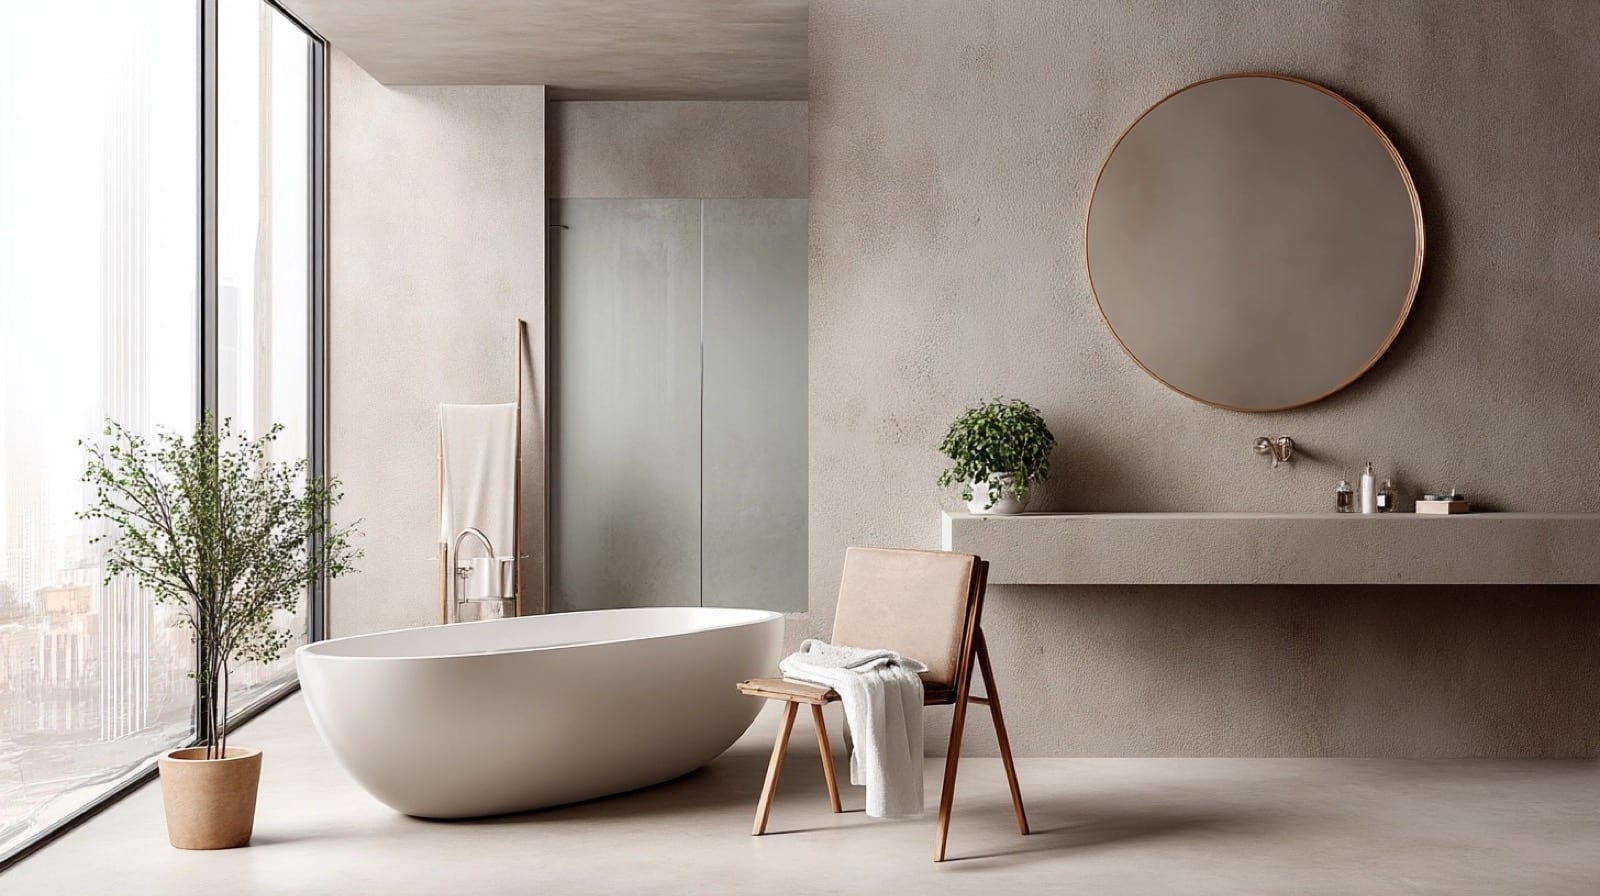
Bathroom floors & walls
Including showers, tubs, and wet areas
Kitchen countertops & backsplashes
With food-safe sealer
Living room & bedroom floors
Seamless open-plan look
Staircases
Continuous flow between levels
Commercial spaces
Restaurants, retail, hotels, spas
Wet rooms & showers
With full waterproofing system
Feature walls & fireplaces
Dramatic accent textures
Furniture & built-ins
Tables, shelves, vanities
The ability to apply microcement over existing tile is especially appealing for renovations. There's no need for messy, expensive demolition — the microcement system bonds directly to the existing surface after proper preparation.
How Is Microcement Applied?
Microcement application is a skilled craft — part science, part art. The process varies depending on the surface, but here's a detailed overview of ATRIA's proven system:
For Walls (4 Steps)
- 1Leveling — smooth the substrate if needed, repair cracks or imperfections
- 2Primerquartz — quartz-filled bonding primer that creates a mechanical key for adhesion
- 3Microcement — two coats of SuperTitanium or Titanium, applied by hand with a steel trowel in opposing directions
- 4Topcoat — Atriapol Antibacterial protective sealer (2 coats minimum) for stain resistance and easy cleaning
For Floors (5 Steps)
- 1Leveling — self-leveling compound for uneven concrete, grinding for existing tile
- 2Atriafloor Primer — specialized floor bonding agent for maximum adhesion under foot traffic
- 3Rasante — two coats of cementitious base coat that builds mechanical strength and hides substrate imperfections
- 4Microcement — two coats of SuperTitanium BC (bi-component), applied by hand with a steel trowel
- 5Topcoat — Atriapol Antibacterial protective sealer (2–3 coats for floors) for abrasion and stain resistance
The entire process takes 3–5 days for a typical bathroom, with each layer requiring proper curing time before the next is applied. Want to see the full technical process? Visit our Education Center for step-by-step guides and video tutorials.
Is Microcement Waterproof?
This depends entirely on the product — and it's one of the most important questions to ask any microcement supplier. Most microcements on the market use acrylic binders, which are water-resistant but not truly waterproof. They require heavy reliance on the topcoat sealer to prevent water damage.
ATRIA's Titanium and SuperTitanium systems are fundamentally different. The polyurethane resin binder creates a hard-elastic, closed-pore structure during curing — the microcement itself is molecularly water-repellent at the material level before any sealer is applied. Combined with our aliphatic polyurethane antibacterial topcoat (ISO 22196:2011-certified, non-yellowing, hard-elastic), the complete system is rated for daily shower use, tub surrounds, and luxury spa-style bathrooms — the same specification European architects write for boutique hotel wet rooms.
This is ATRIA's most significant competitive advantage and the reason architects and contractors are switching from acrylic-based brands. Few microcements available in the United States are built on a polyurethane binder in the decorative layer itself — most rely on acrylic or cement-only chemistry.
Pros and Cons of Microcement
Advantages
- ✓Seamless, grout-free finish — no mold-harboring joints
- ✓Ultra-thin (2–3mm) — doesn't raise floor height or affect door clearances
- ✓Applies over existing surfaces — no demolition required
- ✓Unlimited color options with natural, handcrafted character
- ✓Waterproof at material level (ATRIA polyurethane formula)
- ✓Suitable for floors, walls, countertops, furniture, and exteriors
- ✓Faster installation than tile (3–5 days for a bathroom)
- ✓Eco-friendly — less waste, no demolished material to landfill
- ✓Hygienic — seamless surface is easier to clean than grout lines
Limitations
- ✕Requires skilled professional application — not a DIY-friendly material
- ✕Hairline cracks can appear if substrate moves (cosmetic, not structural)
- ✕Sealer needs reapplication every 5–8 years depending on wear
- ✕Not suitable for structural use — decorative coating only
- ✕Higher upfront cost than basic ceramic tile (but comparable to mid-range tile with installation)
Microcement vs Concrete vs Epoxy vs Tile
How does microcement compare to other popular surface options? Here's a quick breakdown:
| Feature | Microcement | Polished Concrete | Epoxy | Tile |
|---|---|---|---|---|
| Thickness | 2–3mm | 50–100mm | 1–3mm | 10–15mm |
| Over existing surfaces | Yes | No | Yes (floors only) | Rarely |
| Seamless | Yes | Yes (with joints) | Yes | No (grout lines) |
| Waterproof | Yes (ATRIA PU) | No | Yes | With grout sealing |
| Color options | Unlimited | Limited (gray tones) | Many | Many |
| Walls & ceilings | Yes | No | No | Yes |
| Cost installed | $14–34/sqft tiered | $6–12/sqft | $5–12/sqft | $10–50/sqft |
| Lifespan | 15–25+ years | 25+ years | 10–15 years | 20–50 years |
Microcement vs concrete: Polished concrete requires a new concrete slab or an existing one in good condition. It can't be applied over tile, wood, or drywall. Microcement goes over virtually any substrate at just 2–3mm thick. For renovations, there's no comparison.
Microcement vs epoxy: Epoxy is limited to floors and has an industrial, plasticky appearance. Microcement offers a warm, natural mineral texture and works on walls, ceilings, countertops, and furniture — not just floors.
Microcement vs tile: Tile is the traditional choice, but grout lines create maintenance headaches and visual interruptions. For a detailed head-to-head comparison, read our Microcement vs Tile guide.
How Much Does Microcement Cost?
ATRIA microcement is tier-priced by substrate, not by client choice. Floors: Fast tier $14–$18/sf (sound concrete, polished-concrete substrates), Standard tier $19–$24/sf (tile, backer board, gypsum self-leveler), Full Build tier $25–$34/sf (MDF, plywood, OSB, radiant-heat slabs, steel, commercial wet rooms). Material costs alone typically run $3–6 per square foot for the complete system (primer, base coat, microcement, and sealer). Project minimums apply per tier.
Compare that to high-end porcelain tile ($15–30/sqft installed) or natural stone ($30–80/sqft installed), and microcement is highly competitive — especially when you factor in zero demolition costs and faster installation time. For a detailed cost breakdown by room size, check out our Microcement Bathroom Cost Guide.
Maintenance and Lifespan
One of microcement's biggest advantages is how easy it is to maintain. Daily care is simple:
- •Sweep or vacuum regularly to remove grit and dust
- •Mop with a pH-neutral cleaner (no harsh chemicals or bleach)
- •Wipe spills promptly — the sealer protects against stains, but don't let red wine sit overnight
- •Avoid abrasive scrubbing pads on sealed surfaces
- •Reapply Atriapol Antibacterial sealer every 5–8 years for floors, longer for walls
With proper installation and basic maintenance, a microcement surface will last 15–25 years or more. The microcement itself is essentially permanent — it's the protective sealer that wears over time and needs periodic refreshing. When it's time, the sealer can be reapplied without touching the microcement underneath.
How Durable Is Microcement?
Very. ATRIA's SuperTitanium BC achieves a compression strength of 32 ± 2 MPa after 28 days — that's commercial-grade performance at under 1mm thickness. Properly applied and sealed, microcement floors handle heavy foot traffic, furniture, pets, and daily life without issues.
The key to longevity is proper application and sealing. That's why we always recommend professional installation — and why we install every product we sell in the Dallas-Fort Worth area. Our product specifications come from real-world field experience, not a lab.
Can Microcement Be Applied Over Existing Tile?
Yes — and this is one of microcement's biggest selling points for renovations. There's no need for demolition. The existing tiles are ground with a diamond grinder to create a rough surface for adhesion, then the standard floor system (Atriafloor Primer → Rasante → Microcement → Topcoat) is applied directly over the tiles. The grout lines disappear completely under the rasante base coat, and you're left with a flawless, seamless surface.
This approach saves thousands of dollars in demolition and disposal costs, reduces project timeline by several days, and eliminates the dust and noise of tile removal. It's why microcement has become the go-to material for bathroom and kitchen renovations.
What Makes ATRIA Different?
Three things set ATRIA apart from every other microcement brand in the United States:
- 1
Polyurethane + Mineral Formula
Few US-available microcements pair this polyurethane chemistry with a quartz, marble sand, and Etna volcanic mineral blend. The result is a hard-elastic, closed-pore finish with strong mechanical resistance — and, installed over a waterproofing membrane, a fully waterproof wet-area system.
- 2
57+ Years of Italian Heritage
Colorificio Atria S.r.l. has been formulating coatings in Partanna, Sicily since 1968. That's over half a century of refinement, testing, and real-world performance data. Our products include SuperTitanium BC (2-component), Titanium (1-component), Cementius, Stucco Veneziano, Wild Rust, and Metallicum.
- 3
We Install What We Sell
Our team professionally applies every product in our catalog throughout the Dallas-Fort Worth area. Our specifications and application guidelines come from the field, not a spec sheet. When we say a system works in a shower, it's because we've installed it in hundreds of showers.
Frequently Asked Questions About Microcement
Does microcement crack?
Microcement is flexible enough to absorb minor substrate movement, but it's not immune to cracking. If the substrate underneath moves significantly (e.g., a new concrete slab that hasn't fully cured), hairline cracks can appear. These are cosmetic, not structural, and can be spot-repaired. Proper substrate preparation is the best prevention.
Is microcement slippery?
The sealed surface has a similar slip resistance to polished stone. For shower floors and wet areas, we apply a non-slip additive to the final sealer coat that provides excellent grip when wet without compromising the smooth aesthetic.
Can I install microcement myself?
We strongly recommend professional installation. Microcement application requires specialized tools, precise timing between coats, and years of troweling experience to achieve a uniform finish. A poorly applied microcement job will look amateur and may fail prematurely. That said, we do offer training programs for contractors who want to add microcement to their services.
How long does installation take?
A typical bathroom takes 3–5 working days. A full kitchen or large living area may take 5–7 days. Each coat requires proper curing time (typically 12–24 hours) before the next layer is applied.
Ready to Explore Microcement?
Whether you're a homeowner planning a renovation or a contractor looking to add microcement to your services, we're here to help. Browse our microcement products, compare our microcement installation services, build quantities in the system set catalog, explore our education center, connect with a certified professional in your area, or get in touch for a free consultation.
Ready to Transform Your Space?
Contact us for a free quote. Send us your project photos and dimensions, and we'll provide a detailed estimate within 24 hours.